The Course
Hole-by-Hole Virtual Tour
01 | 02 | 03 | 04 | 05 | 06 | 07 | 08 | 09
10 | 11 | 12 | 13 | 14 | 15 | 16 | 17 | 18

Amenities
Course Yardages
Course Yardages »


The whimsical name 'Birdsfoot' gives golfers a hint of what they're about to enjoy at this great Freeport course, a Pittsburgh favorite. Where many lesser golf courses pulse with pretense, Birdsfoot's a charming gem that scores with friendly staff and great golf that'll test all skill levels.
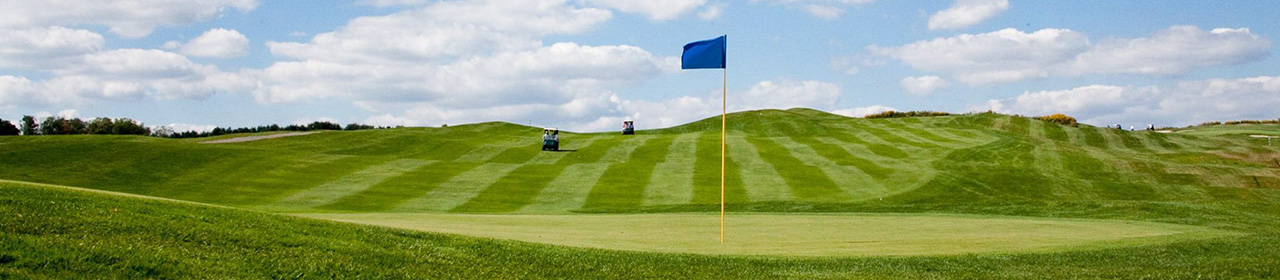
The course features 18 distinct holes -- including four of the area's toughest par 3s -- that attract golfers from all over the tri-state area and challenge every club in the bag. Links-style holes on the front nine mingle with parkland beauties played out over rolling hills that are indifferent to bounces good and bad.
No homes mar the scenery, save for the clubhouse, an old family farmhouse, that looks like it was airlifted from the set of
The Waltons.

A local artist has been commissioned to carve beguiling 'Bogeymen' into the gnarled bark of trees that line the cartpath. Grim-faced and unblinking, they're likely to be the only faces that aren't smiling at Birdsfoot."
- Chris Rodell,
Golf Magazine
Hole No. 1
Virtual Tour
Click anywhere inside the hole map (left) to view a full 360 degree, interactive virtual tour of the course.
Virtual Tours produced by Immerse Your Image.
Architect's Description & Strategy
Birdsfoot Golf Club's starting hole has a generous landing area for the opening tee shot. Challenge the
bunker on the left of the fairway to leave the best angle into the green, and be sure to take enough club
for your uphill approach shot.
Hole No. 2
Virtual Tour
Click anywhere inside the hole map (left) to view a full 360 degree, interactive virtual tour of the course.
Virtual Tours produced by Immerse Your Image.
Architect's Description & Strategy
You must respect the pond on the inside of this sharp dogleg right Par 5. Play toward the fairway
bunkers off the tee, and be careful with your layup on this 3-shotter. The cross bunker short of the
green on the right is a good guide to either hit short of or try and carry if you have the length to go for it.

Hole No. 3
Virtual Tour
Click anywhere inside the hole map (left) to view a full 360 degree, interactive virtual tour of the course.
Virtual Tours produced by Immerse Your Image.
Architect's Description & Strategy
Dubbed the "Hombre", Hole No. 3 is one of the longest Par 4's on the course. Aim down the right side
of this bunkerless hole and allow the natural terrain to feed the ball from right to left. The large subtle
green is meant to hold approach shots from long irons or even fairway woods.
Hole No. 4
Virtual Tour
Click anywhere inside the hole map (left) to view a full 360 degree, interactive virtual tour of the course.
Virtual Tours produced by Immerse Your Image.
Architect's Description & Strategy
The shortest Par 3 out of the four, this beautiful little hole is guarded by a pond on the left and two
bunkers on the right side of the green. You must hit an accurate tee shot to get close to the pin or you
can bail-out short right and be faced with a difficult up-and-down.

Hole No. 5
Virtual Tour
Click anywhere inside the hole map (left) to view a full 360 degree, interactive virtual tour of the course.
Virtual Tours produced by Immerse Your Image.
Architect's Description & Strategy
A good tee shot in the fairway is likely to reach the "speed slot" over the horizon of this landing area and
roll an extra 20-30 yards. The rest of this long Par 5 is all uphill to a tricky 3-tiered green so pick your
club wisely.

Hole No. 6
Virtual Tour
Click anywhere inside the hole map (left) to view a full 360 degree, interactive virtual tour of the course.
Virtual Tours produced by Immerse Your Image.
Architect's Description & Strategy
This short Par 4 is peppered with bunkers and grass depressions on both sides of the fairway. You can
be conservative off the tee or, if you're hitting it well and can work the ball from left to right then it may
be worth the risk to take a shot at driving the green. If you're off the mark though, you may be lucky to
score a 4.

Hole No. 7
Virtual Tour
Click anywhere inside the hole map (left) to view a full 360 degree, interactive virtual tour of the course.
Virtual Tours produced by Immerse Your Image.
Architect's Description & Strategy
A slight dogleg left, the preferred tee shot would be down the right side of the fairway. The uphill green
is a wide target with good depth and a terrace separating the front half from the back, but don't be
fooled by the greenside bunker on the left which is deceptively short of the putting surface.

Hole No. 8
Virtual Tour
Click anywhere inside the hole map (left) to view a full 360 degree, interactive virtual tour of the course.
Virtual Tours produced by Immerse Your Image.
Architect's Description & Strategy
This is a fairly straightforward hole with the fairway divided down the middle by a long terrace creating a
high side on the right and a lower side on the left. If you err to the right off the tee there's a good
chance the slope will kick the ball back into the fairway.

Hole No. 9
Virtual Tour
Click anywhere inside the hole map (left) to view a full 360 degree, interactive virtual tour of the course.
Virtual Tours produced by Immerse Your Image.
Architect's Description & Strategy
Lace up your spikes and grab enough club for this spectacular Par 3 finishing hole! Although the green is
one of the largest on the course, but you MUST get over the large deep ravine first.

Hole No. 10
Virtual Tour
Click anywhere inside the hole map (left) to view a full 360 degree, interactive virtual tour of the course.
Virtual Tours produced by Immerse Your Image.
Architect's Description & Strategy
Challenge the bunker on the left side of the fairway to set up the best angle into the green. The long
and narrow green is set in from left to right and depending on the pin placement coupled with the
higher elevation could mean the difference between hitting one or two extra clubs.
Hole No. 11
Virtual Tour
Click anywhere inside the hole map (left) to view a full 360 degree, interactive virtual tour of the course.
Virtual Tours produced by Immerse Your Image.
Architect's Description & Strategy
A bunker surrounds the entire green on this slightly uphill Par 3. There is a narrow opening in front
allowing shots to run onto the putting surface, but if you do miss the green you'll be looking at making a
sandy to save par.

Hole No. 12
Virtual Tour
Click anywhere inside the hole map (left) to view a full 360 degree, interactive virtual tour of the course.
Virtual Tours produced by Immerse Your Image.
Architect's Description & Strategy
This strong dogleg right offers a dramatic downhill tee shot from the highest point on the course. There
is a wide fairway, but aim down the left side or par could be even harder to achieve. A slope running
laterally through the center of the green helps feed the ball to a back right pin.

Hole No. 13
Virtual Tour
Click anywhere inside the hole map (left) to view a full 360 degree, interactive virtual tour of the course.
Virtual Tours produced by Immerse Your Image.
Architect's Description & Strategy
The first of the tree lined holes at Birdsfoot, this Par 5 requires accuracy from tee to green. The only
bunker to avoid on this hole is right of the green, and it's always best to be putting uphill to any hole
location.

Hole No. 14
Virtual Tour
Click anywhere inside the hole map (left) to view a full 360 degree, interactive virtual tour of the course.
Virtual Tours produced by Immerse Your Image.
Architect's Description & Strategy
You need to hit it slightly left to right to fit your drive into the landing area framed by bunkers. The
green is also bunkered to the right and left with a distinct bowl in the middle right of the putting surface
that puts a premium the correct distance for all approach shots.

Hole No. 15
Virtual Tour
Click anywhere inside the hole map (left) to view a full 360 degree, interactive virtual tour of the course.
Virtual Tours produced by Immerse Your Image.
Architect's Description & Strategy
You don't need to overpower this hole. Get it in the fairway off the tee and leave yourself your favorite
yardage into the green.
Hole No. 16
Virtual Tour
Click anywhere inside the hole map (left) to view a full 360 degree, interactive virtual tour of the course.
Virtual Tours produced by Immerse Your Image.
Architect's Description & Strategy
Of all the Par 5's, this one offers the best chance for an eagle. The right side of the fairway will leave you
with the shortest distance to the green in two, but the hillside along the right hides the green tucked in
behind it. If you play right of the cross bunkers in the 2nd landing area and take dead aim toward the
green, you may end up putting for a three.

Hole No. 17
Virtual Tour
Click anywhere inside the hole map (left) to view a full 360 degree, interactive virtual tour of the course.
Virtual Tours produced by Immerse Your Image.
Architect's Description & Strategy
The last Par 3 at Birdsfoot Golf Club is also one of the most striking with multiple grass depressions
shaped into the slopes in front and behind the green. This long and shallow green is cut into the slope
on an angle from left to right and demands that you hit the right club to find the putting surface.

Hole No. 18
Virtual Tour
Click anywhere inside the hole map (left) to view a full 360 degree, interactive virtual tour of the course.
Virtual Tours produced by Immerse Your Image.
Architect's Description & Strategy
You have a choice to make with a split fairway on either side of the large undulating spine down the
middle of the hole. The safe shot is down the right side, but you'll be left with a longer, blind 2nd shot
into a demanding green. The riskier tee shot to the left side requires a longer carry and a slightly left-toright
shot to hold the landing area. If you can successfully negotiate the fairway on the left, the slope of
the fairway will carry the ball a few extra yards and leave a shorter shot and better angle in for the
approach.